


Nearly half of all car seats on the road today are installed or used incorrectly. Not a small handful. Not a rare exception. According to the National Highway Traffic Safety Administration (NHTSA), almost one out of every two car seats is installed or used wrong.
The good news is almost every one of those mistakes is fixable in under ten minutes once you know what to look for. Whether you're bringing home a newborn in an infant car seat or moving your toddler into a convertible car seat, this guide walks you through the ten most common car seat installation mistakes, why they happen, and how to correct them so that the seat is installed the way the manufacturer intended.
Mistake #1: The Installation Is Too Loose
How much should a car seat move when installed?
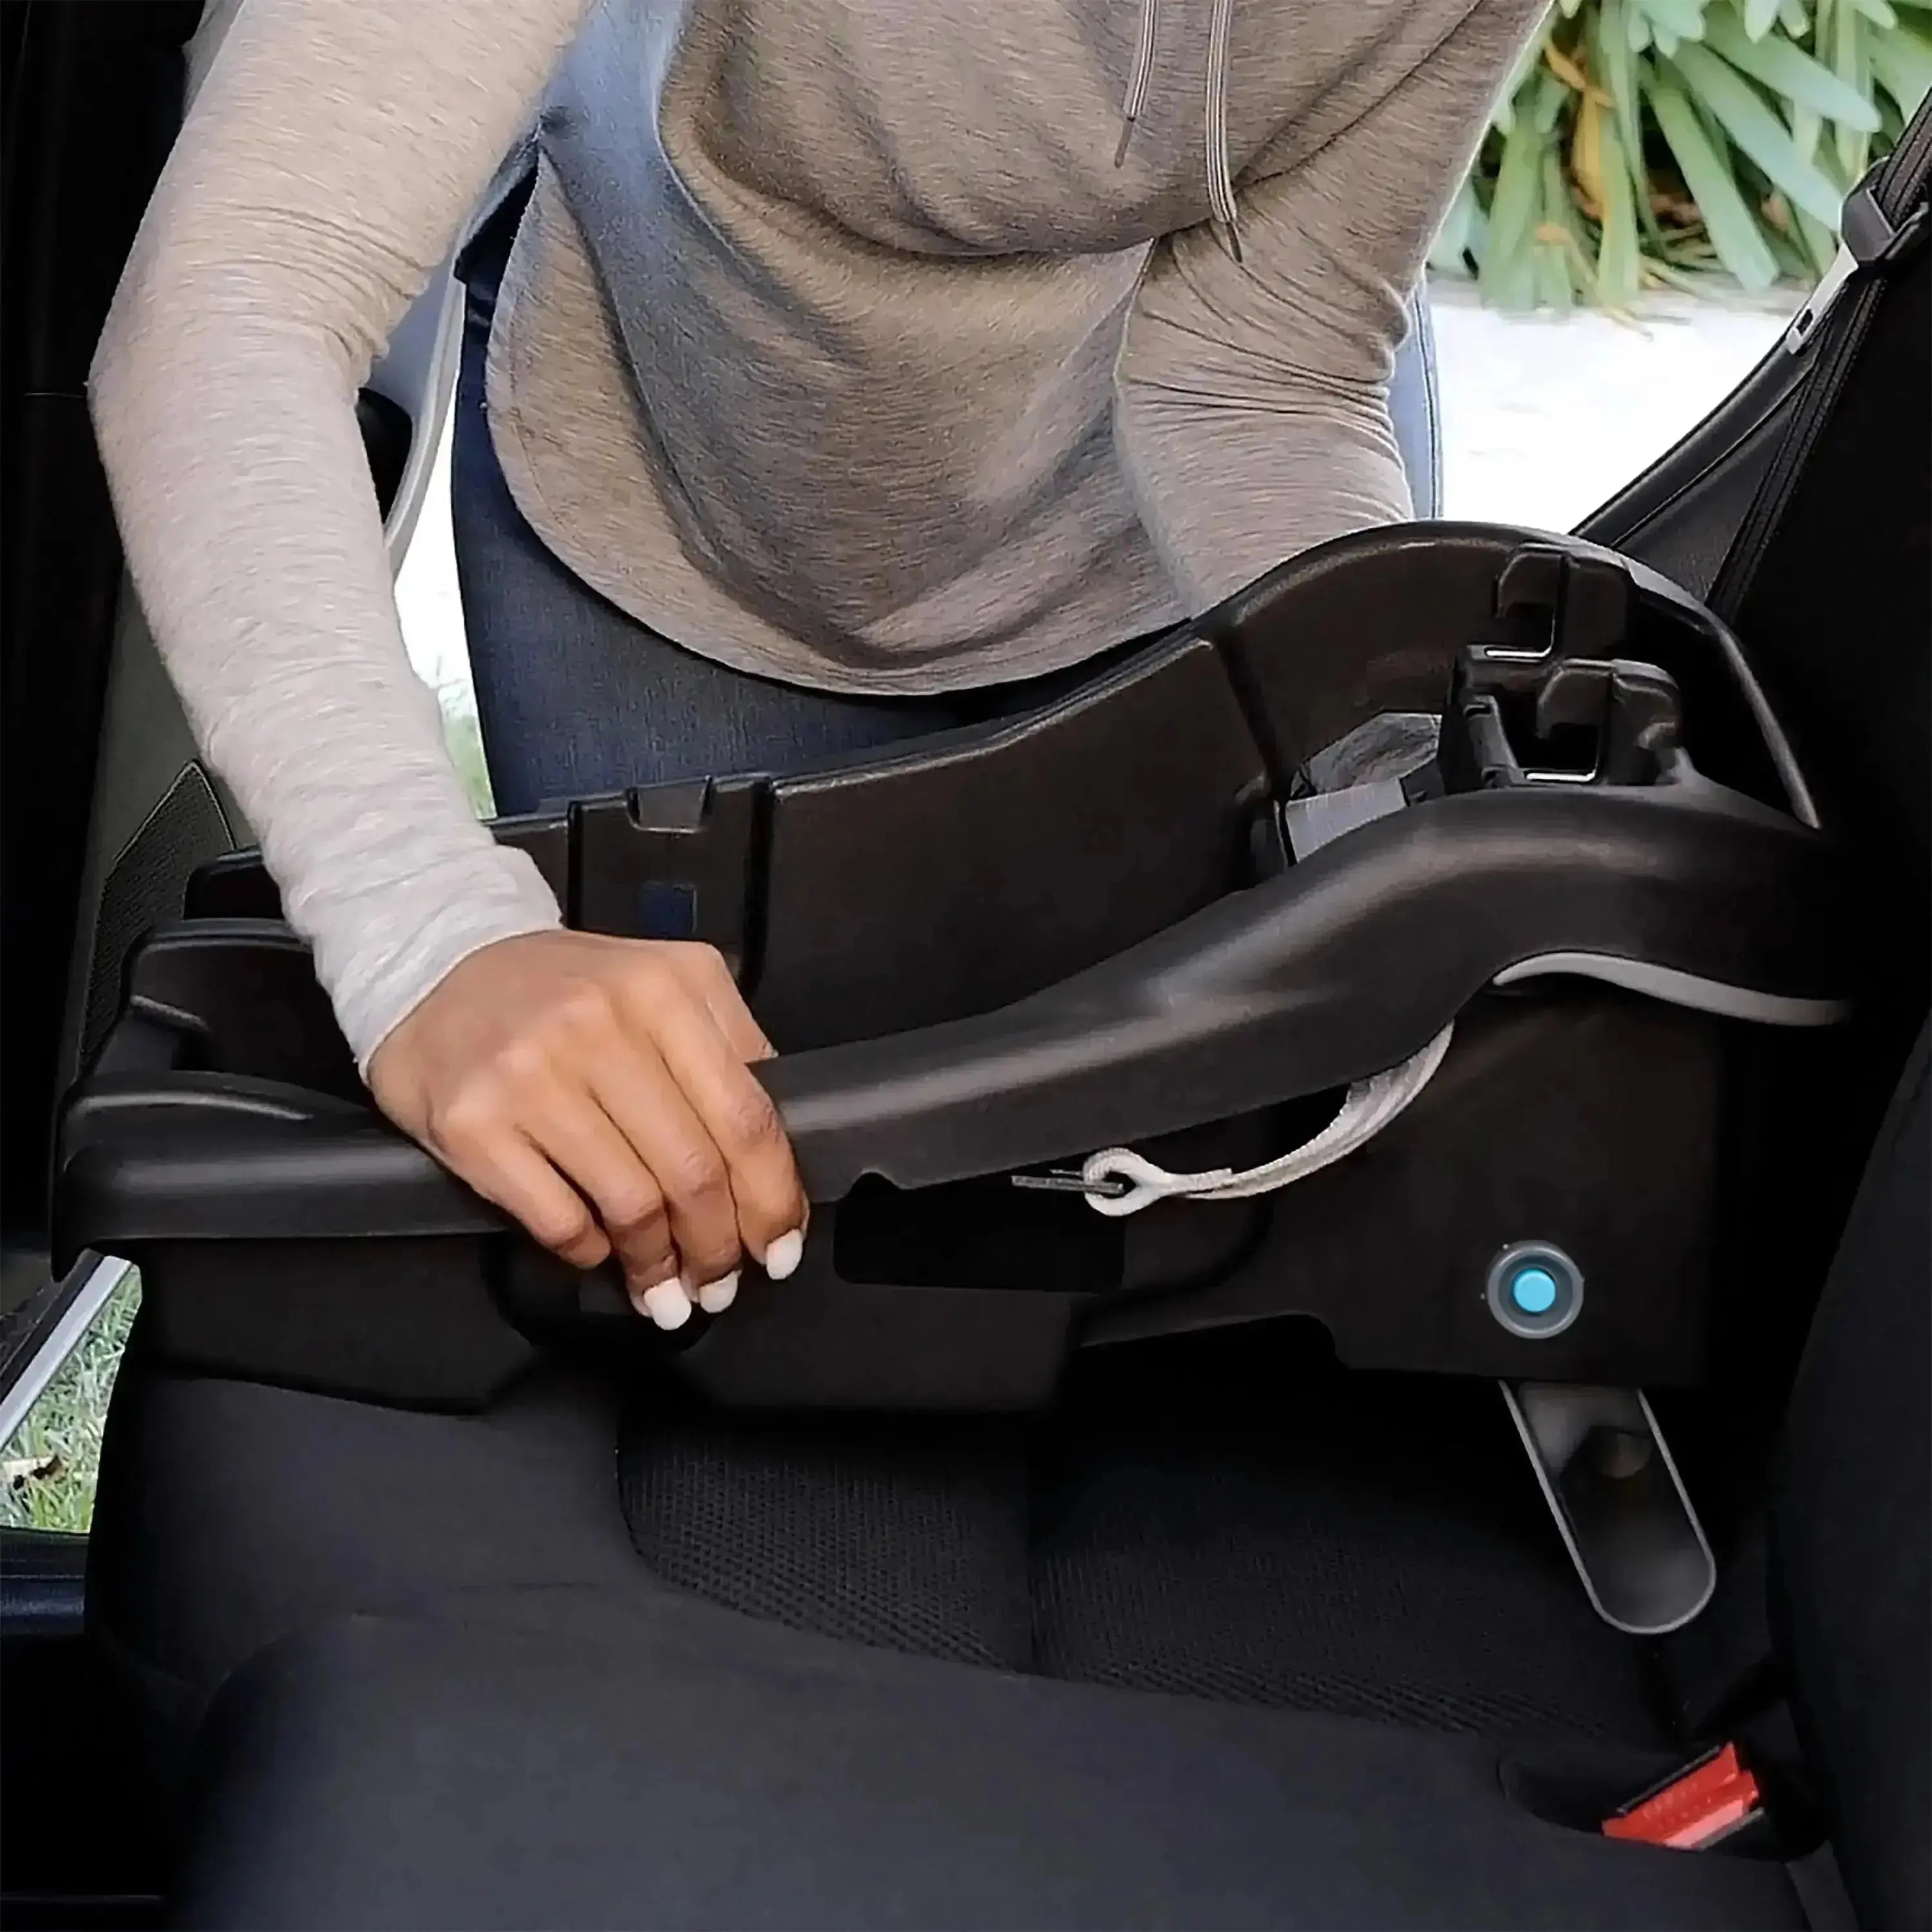
This is the mistake certified car seat technicians see more than any other. Once your car seat is installed, grab it at the belt path (the spot where the seat belt or lower anchor strap runs through the seat) and give it a firm tug side to side and front to back. It should move less than one inch in any direction. If it slides, wiggles, or rocks more than that, the installation needs to be tightened.
Why does this matter so much? In a sudden stop, a loosely installed seat travels with the momentum of the vehicle before the belt or anchors catch it, and that extra movement works against everything the seat is designed to do.
How to fix it: Press your knee or forearm into the seat while you pull the slack out of the seat belt or lower anchor strap. Putting your body weight into the seat as you tighten compresses the vehicle cushion and lets you remove far more slack. Then do the inch test again at the belt path, not at the top of the seat; the top of the seat will naturally move a bit more.
Can a car seat be installed too tightly?
The short answer: it's very hard to over-tighten an installation, and a rock-solid fit at the belt path is exactly what you want. What you don't want is to crank the seat down so aggressively that the car seat's shell or base is visibly warped or the recline angle changes. If the seat still sits at the correct angle and nothing is bent or distorted, tighter is better.
When in doubt, check your car seat manual and your vehicle owner's manual; both will tell you what a proper installation looks like for your specific combination.
Mistake #2: Harness Straps at the Wrong Height
Where should the harness straps sit on my child?
Here's a rule that trips up even experienced parents because it changes, depending on which direction your child faces:
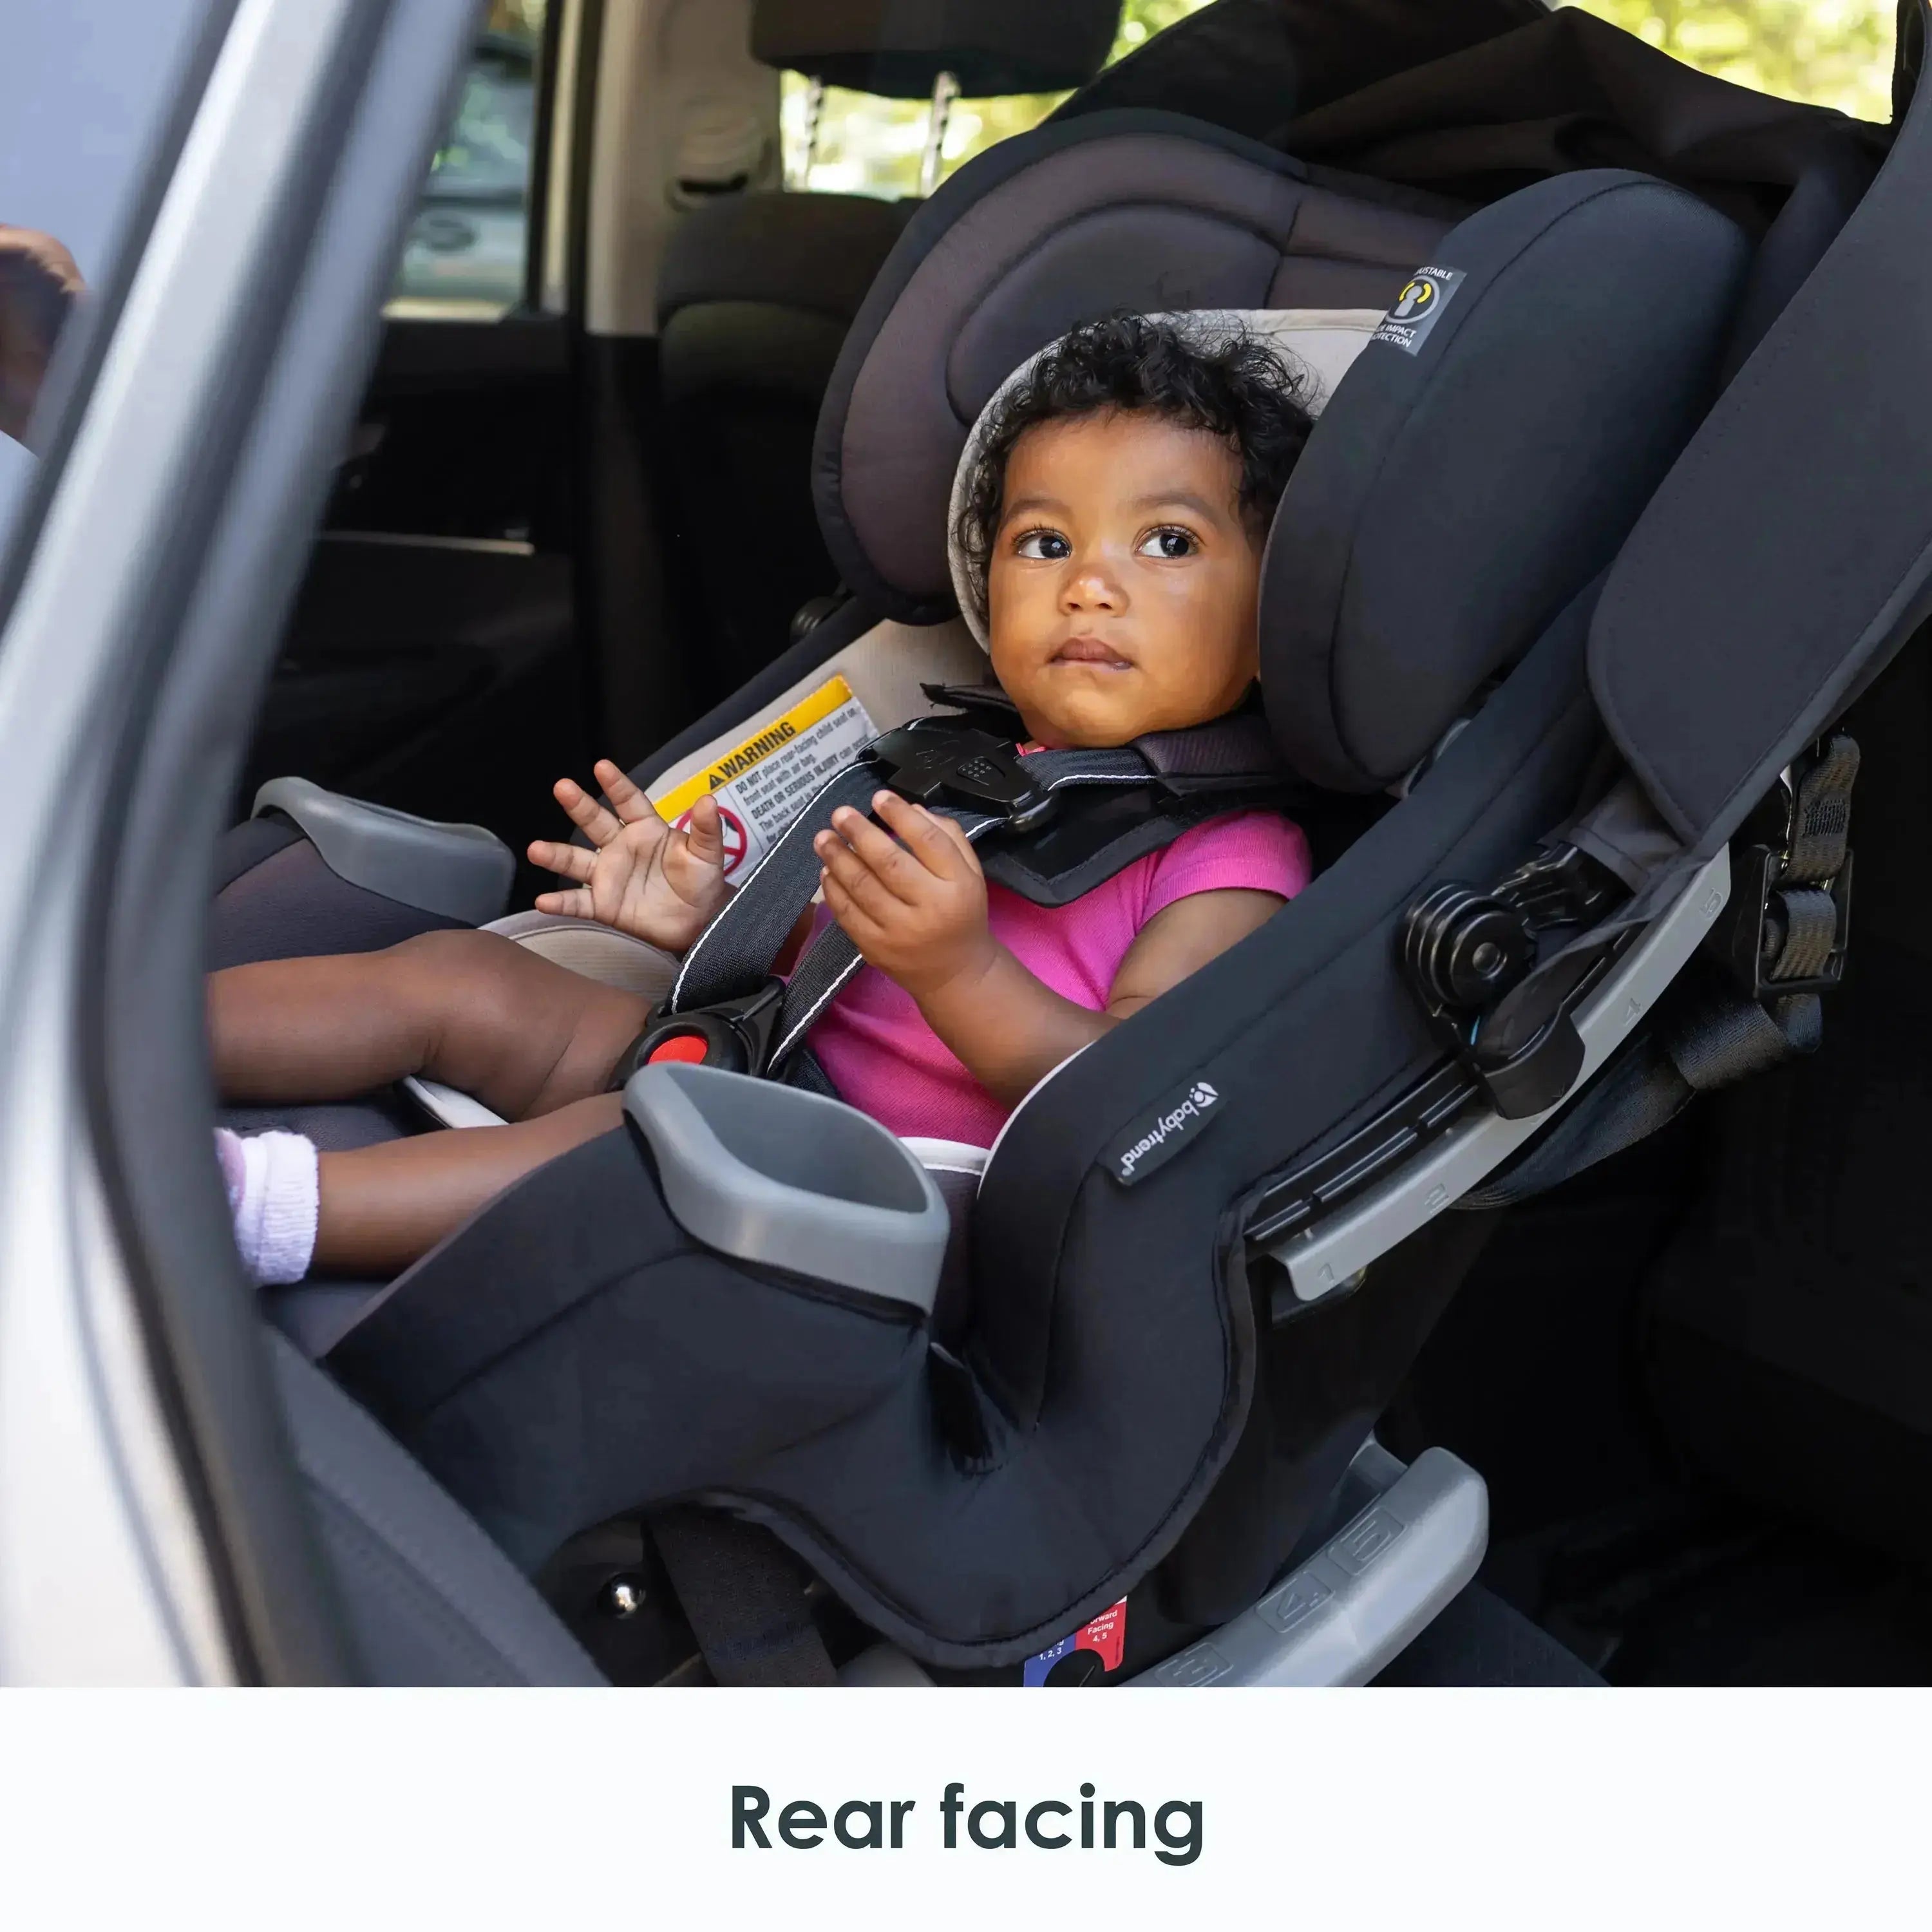
- Rear-facing: The harness straps should come through the seat's slots at or just below your child's shoulders.
- Forward-facing: The straps should come through at or just above the shoulders.
Why the difference? In rear-facing mode, straps positioned at or below the shoulders keep your little one held down into the shell of the seat. Forward-facing straps at or above the shoulders prevent excess downward slack.
How to fix it: Sit your child in the seat and look at where the straps exit the shell relative to their shoulders. Many modern seats, including Baby Trend's convertible models like the Cover Me™ 4-in-1, feature a no-rethread harness, which means you can raise or lower the strap height with a squeeze-and-slide headrest adjustment, no disassembly required. On older or simpler seats, you may need to unthread the straps from the back and move them to the correct slot. Your manual will show you how.
Mistake #3: The Harness Is Too Loose on Your Child
What is the 2 finger rule for car seats?
The two finger guideline traditionally refers to checking the space between the harness and your child's collarbone, but most technicians today teach something even simpler and more reliable: the pinch test.
Here's how it works: buckle your child in, tighten the harness, then try to pinch the webbing of the strap vertically at your child's shoulder. If you can pinch a fold of the strap between your thumb and forefinger, the harness is too loose. If your fingers slide right off because there's no slack to grab, you've got it right.
A snug harness should lie flat, without twists, and shouldn't allow you to gather any material at the shoulder. Twisted straps are a related mistake; a twisted strap concentrates force on a narrow band of webbing instead of spreading it across the full width, so smooth those straps flat every single ride.
How to fix it: Tighten the harness adjuster strap (usually at the front of the seat between your child's legs) until the pinch test passes. It takes five extra seconds. Do it every trip, because harness tension changes with clothing, wiggling, and growth.

Mistake #4: The Chest Clip Is in the Wrong Spot
Where should the chest clip be on a car seat?
The chest clip has one job: to hold the harness straps in the correct position over your child's shoulders. For it to do that job, it needs to sit at armpit level (level with your child's armpits), centered on the chest.
The two most common errors are placing it too low (down near the belly) or too high (up at the throat). Too low, and the straps can slip off the shoulders. Too high, and it presses against the neck.
How to fix it: After buckling and tightening the harness, slide the chest clip up or down until it lines up with the armpits. Make it part of your buckle-up rhythm: buckle, tighten, pinch test, clip to armpits. Say it enough times and it becomes as automatic as checking your mirrors.

Mistake #5: Using LATCH and the Seat Belt at the Same Time
Is it better to install a car seat with a seat belt or LATCH?
Neither method is better than the other, but you should almost never use both at once.
LATCH (Lower Anchors and Tethers for Children) was introduced to make installation easier, not superior. A correct seat belt installation performs just as well as a correct LATCH installation. The right choice is simply whichever method gives you the tightest fit in your vehicle, and that varies from car to car and seating position to seating position.
A few key points parents often miss:
- LATCH has weight limits. Most lower anchors are rated for a combined child-plus-seat weight of 65 pounds. Once your child (plus the seat) exceeds that, you must switch to a seat belt installation. Check both your car seat manual and vehicle manual for exact numbers.
- The center seat often doesn't have lower anchors. Many vehicles only provide LATCH anchors in the outboard positions. "Borrowing" one anchor from each side to install in the middle is not allowed unless both your vehicle manual and car seat manual explicitly permit it.
- The top tether is not optional for forward-facing seats. Whether you install with LATCH or the seat belt, always attach the top tether on a forward-facing harnessed seat. It dramatically reduces how far the seat can pitch forward.
How to fix it: Pick one method, the one that gets you an installation that passes the inch test, and use it correctly. Baby Trend seats like the Trooper™ 3-in-1 include clearly labeled belt paths for both methods, so follow the path for the mode and method you've chosen and stow the unused hardware.

Mistake #6: The Wrong Recline Angle for a Rear-Facing Seat
Why does the recline angle matter for infants?
Newborns can't hold their heads up, and their airways are about the width of a drinking straw. If a rear-facing seat is installed too upright, a sleeping infant's heavy head can slump forward, chin to chest, and restrict breathing. Too reclined, and the seat won't perform as designed in a sudden stop.
That's why rear-facing seats are engineered to sit within a specific angle range, typically 30 to 45 degrees, with newborns needing the more reclined end of that range.
How to fix it: Use the built-in angle indicator. Nearly every modern rear-facing seat has one, a bubble level, a ball indicator, or a line that must be level with the ground. The Baby Trend EZ-Lift™ PLUS Infant Car Seat base, for example, includes an adjustable recline foot and a level indicator so you can dial in the correct angle even on sloped vehicle seats.
Park on level ground when you check it, because your driveway's slope can fool the indicator. As your baby grows and gains head control, most seats allow (and some require) a more upright angle. Your manual will tell you when to adjust.

Mistake #7: Turning Your Child Forward-Facing Too Soon
When should I switch my child from rear-facing to forward-facing?
That first birthday used to be the traditional milestone for flipping the seat around, and a lot of well-meaning grandparents still repeat it. But current guidance from the American Academy of Pediatrics is to keep children rear-facing as long as possible, until they reach the maximum height or weight limit of their rear-facing seat, which for most convertible seats means age two, three, or even four.
Rear-facing isn't just for babies. In that position, the shell of the seat cradles the child's head, neck, and spine and spreads crash forces across the entire back, exactly what a young child's developing body needs. A rear-facing child whose feet touch the vehicle seatback, or whose legs bend criss-cross style, is perfectly fine. Leg room is a comfort question, not a readiness signal.
How to fix it: Check the rear-facing height and weight limits printed on the side of your seat. Convertible seats like the Baby Trend Cover Me™ 4-in-1 accommodate rear-facing children up to 40 pounds, which lets most kids stay rear-facing well past their second birthday before converting the same seat to forward-facing mode. If your child is still under the limits, there's no rush; the longer they ride rear-facing, the better.

Mistake #8: Buckling Over a Bulky Winter Coat
Can my child wear a coat in the car seat?
A puffy coat feels snug when you tighten the harness over it, but all that loft is just trapped air. Under sudden force, the air compresses instantly, and the harness that felt tight is suddenly inches too loose.
Try this test at home: buckle your child in wearing the coat and tighten the harness until it passes the pinch test. Then, without loosening anything, take the coat off and buckle them back in. See all that slack? That's the gap the coat was hiding.
How to fix it: Dress your child in thin, warm layers. Think fleece, not puff. Buckle the harness snugly against their body, then put the coat on backward over the buckled harness, or lay a blanket over them once they're strapped in. Warmth on the outside of the harness is fine; bulk underneath it is the problem.
Mistake #9: Putting the Seat in the Wrong Spot, or Wondering If There Is One
Should you put a baby car seat behind the driver or passenger?
There is a preferred spot for where to place your child’s car seat, but there isn’t necessarily a wrong spot. The “right” place depends on your vehicle.
Recommendations say you should place the car seat in the back seat, and the center rear position is statistically the best spot when a correct installation is possible there because it's the position farthest from every door.
But a correct installation beats a centered one. If your vehicle's center seat has a hump, a narrow cushion, or no lower anchors and you can't get a tight fit there, placing it on the driver’s or passenger’s side with a rock-solid installation is the better choice.
As for whether the driver's side versus passenger side is better, there's no meaningful performance difference. Practical considerations usually decide it:
- Behind the passenger makes it easier to see your baby from the driver's seat with a mirror, and lets you load your child from the curb side on city streets.
- Behind the driver can be more convenient in your own driveway and keeps the seat on the side you naturally walk to.
How to fix it: Choose the back-seat position where you can achieve an installation that passes the inch test, ideally the center. And never place a rear-facing seat in front of an active airbag.

Mistake #10: Not Locking the Seat Belt
Why is my seat belt installation still loose no matter how hard I pull?
If you've chosen a seat belt installation, tightening the belt is only half the job. You also have to lock it. In everyday driving, your seat belt spools in and out freely. For a car seat installation, that free-spooling belt must be converted into a fixed, locked strap.
Most vehicles made after 1996 have a switchable retractor: pull the shoulder belt all the way out until it stops, then feed it back in and you'll hear a ratcheting click. That's locked mode. Some seats instead use built-in lock-offs (clamps on the seat itself) that grip the belt. Your car seat manual and vehicle manual will tell you which applies.
Reading your car seat manual can help reduce a large number of mistakes for car seat installation:
- Missed belt paths
- Forgotten top tethers
- Expired seats
- Unregistered seats that never receive recall notices
Every one of these is preventable with fifteen minutes of reading. Baby Trend prints installation instructions on labels right on the seat and includes manual storage on the seat itself, so the answers are literally attached to the product.
How to fix it: Read the car seat manual cover to cover, read the child restraint section of your vehicle owner's manual, register your seat with the manufacturer, and check the car seat’s expiration date. It may be boring, but it’s absolutely worth it.
Bonus Questions Every New Parent Asks
How do I know if a car seat is installed correctly?
Run this five-point check:
- Right seat for the child: your child is within the height and weight limits for the seat and its current mode.
- Right direction: rear-facing until the child outgrows the rear-facing limits.
- Inch test passed: less than one inch of movement at the belt path.
- Correct angle: the recline indicator shows the seat is within range.
- Harness check: straps at the correct height, pinch test passed, chest clip at armpit level.
If all five boxes are ticked, you should feel pretty confident that you installed the car seat correctly.
Who can check if my car seat is installed correctly near me?
Certified Child Passenger Safety Technicians (CPSTs) are trained specifically to inspect installations and teach you how to do it yourself. To find one:
- Search the national inspection station locator on NHTSA's website (nhtsa.gov/equipment/car-seats-and-booster-seats). Enter your ZIP code and you'll get a list of nearby inspection locations and upcoming check events.
- Many fire stations, hospitals, police departments, and health departments host regular car seat check events. Call ahead because not every firefighter is a certified technician.
- Some areas offer virtual inspections over video call, which became widely available in recent years and works surprisingly well.
A good technician won't just install the seat for you; they'll watch you do it, so you can repeat it confidently when you move the seat to Grandma's car.
What is the 2 hour rule for car seats?
The two hour rule says that babies, especially newborns, shouldn't remain in a car seat for more than two hours at a stretch. Infant seats hold babies in a semi-upright, scrunched position, and extended time in that posture can restrict a newborn's airway and put pressure on their developing spine.
On long road trips, plan a stop every two hours: take the baby out, let them stretch flat, feed and change them, and then continue. The same logic applies outside the car; an infant carrier like the Baby Trend EZ-Lift PLUS clicks conveniently into a Baby Trend stroller frame for errands, but the car seat shouldn't double as an all-day napping spot or overnight bed. When the ride ends and if your baby is asleep, transfer them to a flat, firm sleep surface.

Do I need to replace my car seat after a crash?
Often, yes. NHTSA advises replacing a car seat after any moderate or severe collision, and some manufacturers require replacement after any crash, no matter how minor. Check your manual for your seat's specific policy, and never buy a used seat with an unknown history; you can't see internal stress damage from the outside.
Installing With Confidence
Car seat installation isn't a one-and-done task; it's a habit. Seats get moved between vehicles, kids grow into new harness heights, winter coats appear, and belts loosen over time. So before your next ride with your baby, go out to the car with your manual and this list. Give the seat a tug. Check the angle. Slide that chest clip to armpit level. And if anything feels uncertain, book an appointment with a certified technician to make sure you can ride with confidence.
This article is for general informational purposes. Always follow the instructions in your car seat manual and vehicle owner's manual, which take precedence over any general guidance.
